

How To Set Shutter Speed On Nikon D3200
This chapter is from the book
M: Manual Style
In one case upon a time, long before digital cameras and plan modes, there was Manual mode. In those days it wasn't called "transmission mode," because there were no other modes—it was just photography. In fact, many photographers cutting their teeth on completely transmission cameras. Allow's face it—if you want to learn the effects of aperture and shutter speed on your photography, there is no meliorate way to acquire than past setting those adjustments yourself. However, today, with the advocacy of camera engineering, many new photographers never give this mode a second thought. That'due south truly a shame, as not only is information technology an first-class fashion to larn your photography basics, but it's likewise an essential tool to have in your photographic bag of tricks.
When you have your camera set to Transmission (G) mode, the camera meter will give you a reading of the scene you are photographing. It's your job, though, to set both the f-stop (aperture) and the shutter speed to achieve a right exposure. If you need a faster shutter speed, you will accept to brand the reciprocal alter to your f-stop. Using whatever other mode, such as Shutter Priority or Aperture Priority, would hateful that you simply have to worry about one of these changes, just Manual style means you accept to do it all yourself. This can be a little challenging at first, but afterward a while yous will have a consummate agreement of how each change affects your exposure, which volition, in turn, meliorate the way that you use the other modes.
When to apply Manual (M) mode
- When learning how each exposure element interacts with the others (Figure 4.12)
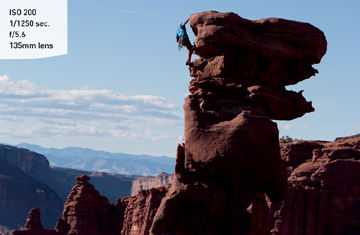
Effigy 4.12. Since my master subject was in the light, I fix the camera to Manual so I could underexpose and keep the heaven darker and more blueish without worrying about the areas that vicious into shadow.
- When your environment is fooling your light meter and you need to maintain a certain exposure setting (Figure 4.13)
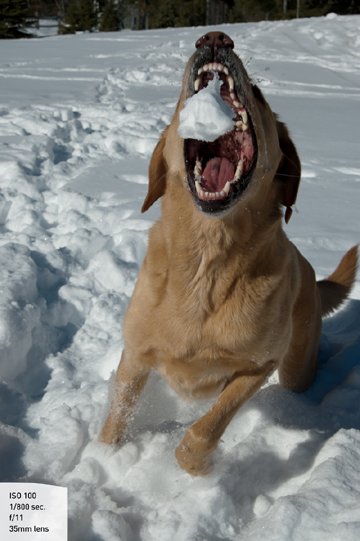
Figure iv.thirteen. Beaches and snowfall are always a challenge for light meters. Add to that the desire to have exact control of depth of field and shutter speed, and you lot have a perfect scenario for Manual fashion.
-
When shooting silhouetted subjects, which requires overriding the camera'southward meter readings (Figure 4.14)
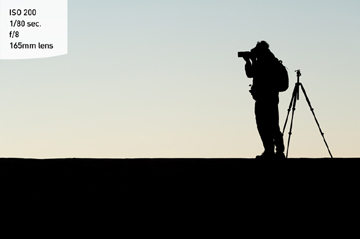
Figure four.fourteen. While waiting for the sun to ascension, I turned to a fellow photographer and used Transmission mode to push the foreground elements into consummate silhouette.
Setting up and shooting in Manual style
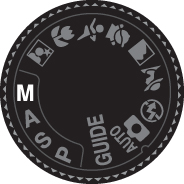
- Turn your camera on, and so turn the Mode dial to align the M with the indicator line.
- Select your ISO by pressing the i button on the lower-left portion of the dorsum of the camera (if the camera's info screen is not visible, press the Info button or i button).
- Press up or down on the Multi-selector to highlight the ISO option, then select OK.
- Printing downwardly on the Multi-selector to select the desired ISO setting, then press OK to lock in the change.
- Point the camera at your subject area, and and so activate the camera meter past depressing the shutter button halfway.
- View the exposure data in the lesser area of the viewfinder or past looking at the brandish console on the rear of the camera.
- While the meter is activated, use your pollex to roll the Control punch left and correct to change your shutter speed value until the exposure mark is lined up with the zilch marking. The exposure information is displayed by a calibration with marks that run from –2 to +2 stops. A "proper" exposure will line up with the pointer mark in the middle. Every bit the indicator moves to the right, it is a sign that y'all volition be underexposing (there is non plenty calorie-free on the sensor to provide adequate exposure). Move the indicator to the left and you will be providing more exposure than the photographic camera meter calls for; this is overexposure.
- To fix your exposure using the discontinuity, depress the shutter release push until the meter is activated. Then, while holding down the Exposure Compensation/Aperture push (located backside and to the right of the shutter release button), rotate the Command dial to alter the aperture. Rotate right for a smaller aperture (large f-stop number) and left for a larger aperture (modest f-terminate number).
Think that when you are using Manual fashion, it is up to you to decide what is the most important thing to worry nigh. Do you need a fast shutter? Practise you want narrow depth of field? You decide and then you accept control. It's actually ane of the best ways to learn how each change affects your image.
Source: https://www.peachpit.com/articles/article.aspx?p=1930034&seqNum=6
0 Response to "How To Set Shutter Speed On Nikon D3200"
Post a Comment